In this article let us take a look at how to install exchange 2013 SP1, which is the latest exchange application from Microsoft. Before staring the step by step installation let us go through some improvements that Microsoft had done in this latest version.
- EAC: The Exchange Administration Center, as the word suggests it give the admins a lot to manage the exchange organization from the web console. This features gives us the opportunity to manage our server from anywhere in the world with an internet connection using any browser, I am not telling that we can do each and everything using this wonderful tool, but we can do basic configuration using EAC,but unfortunately the traditional console EMC is replaced by this GUI.
- Exchange management shell: There is an advanced management shell in exchange 2013 which supports a lot of new cmdlts.Around 13 clts has been removed from the previous 2010 exchange but much more has been added to this great tool.
- DLP: Data Loss Prevention is something in in Exchange 2013 transport rule which helps the admins a lot in securing and retrieving data.
- Architectural changes: We know that there are five server roles in the legacy version of Exchange, but in 2013 we have two roles (The exchange mailbox role and the Client access role) we can of course use the Edge transport role in the new SP1.
These are
only some main changes and the real number counts a lot.
Now let us
look at the installation steps of Exchange 2013 in server 2012 64 bit.
Please
refer the Microsoft url for system requirements: http://technet.microsoft.com/en-in/library/aa996719%28v=exchg.150%29.aspx
Preparation
Let us prepare our server 2012 for the exchange,i am assuming that you have an Active directory in place and the server we are working on is a member server.
Step 1
Launch PowerShell as administrator for installing the
features required for Exchange, for this copy paste the below shell command and
hit enter.
Install-WindowsFeature
AS-HTTP-Activation, Desktop-Experience, NET-Framework-45-Features,
RPC-over-HTTP-proxy, RSAT-Clustering, Web-Mgmt-Console, WAS-Process-Model, Web-Asp-Net45,
Web-Basic-Auth, Web-Client-Auth, Web-Digest-Auth, Web-Dir-Browsing,
Web-Dyn-Compression, Web-Http-Errors, Web-Http-Logging, Web-Http-Redirect,
Web-Http-Tracing, Web-ISAPI-Ext, Web-ISAPI-Filter, Web-Lgcy-Mgmt-Console,
Web-Metabase, Web-Mgmt-Console, Web-Mgmt-Service, Web-Net-Ext45,
Web-Request-Monitor, Web-Server, Web-Stat-Compression, Web-Static-Content,
Web-Windows-Auth, Web-WMI, Windows-Identity-Foundation,
RSAT-Clustering-CmdInterface, RSAT-ADDS

It will take some time for the completion and will ask for a restart.
After the restart we have all the features installed and are ready to
go for the installation of a couple of dependencies.
Microsoft Unified
Communications API 4.0
Please download the package from the below Microsoft URL:

Filter Pack installation
Please download the package from the below Microsoft URL:

It is a good idea to run a system
update before proceeding to the next step.
Control panel – Windows update and
check for updates. There might be a restart once the updates are downloaded.
Now let us move to Exchange Server installation.I am adding a series of screenshots rather than words.
I am assuming that you have downloaded the Exchange installation media


I am assuming that you have downloaded the Exchange installation media
- Once extracted double click setup.exe
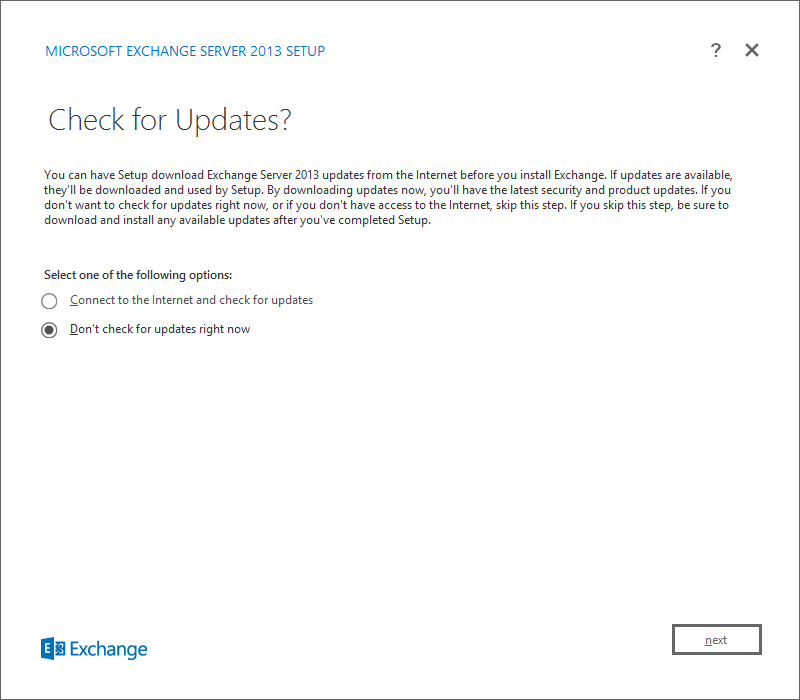
- Will get an option to choose the latest update download from the internet.
- Now it is time to accept the license agreement of Microsoft.
- Choose recommended.
- Here we need to choose which roles we have to install in this server.If you can going to compliment a test environment check Mailbox and Client access role,in production Microsoft recommend to install these roles in different servers.In Exchange 2013 service pack 1 you can also select Edge role(Has to install in a separate server)
- Just choose the installation directory.
- Specify the Exchange organization name.
- Here you can choose whether to opt or opt-out the malware filter.
- Now we have to wait some time to complete the readiness checks.
- If you have all dependencies installed you will get no error and sometime a couple of warnings only.
- Click Install
- Now the setup process has been started here you can see 15 step process,but it will vary depends on what roles you have chosen for installation.

No comments:
Post a Comment